
Why this patio and walkway maintenance checklist matters for Connecticut homeowners
If you own a patio or paved walkway in Connecticut, this patio and walkway maintenance checklist helps you protect the investment before seasonal weather damages base materials and joints. Freeze and thaw cycles, heavy autumn leaf loads, and winter de-icing can all accelerate deterioration. Contractors on our site note that simple preventive steps often cost far less than repairing a base that has washed out or heaved. Follow this checklist to prioritize inspections, quick fixes, and winter preparation so you avoid emergency rebuilds next spring.
Annual inspection checklist: what to look for and why
Do a thorough walk-around at least once a year, ideally in late spring after thawing and again in early fall before leaves and heavy rain begin. Annual checks catch small issues before they become structural problems.
- Surface evenness: Walk every paved area looking for new trip hazards, dips, or raised units. Local guidance shows paver patios commonly last 20 to 30 years when the base and drainage are correct, but repeated heave shortens that life quickly.
- Joint condition: Check whether joint sand is missing or washed away. Joint sand prevents water from entering the base and limits lateral movement.
- Edge restraint integrity: Inspect perimeter restraints for cracks, separation, or missing anchors. A broken edge is a common cause of lateral spreading.
- Drainage and ponding: Stand in typical runoff areas after a rain. Any ponding means water can reach and weaken the subbase.
- Vegetation: Remove moss, weeds, and tree seedlings in joints. Root growth lifts units and creates gaps for water to enter.
Quick maintenance tasks you can do this weekend
These actions protect the base and joints with minimal cost and no heavy equipment. They belong on your seasonal to-do list.
- Clear leaves and debris: Remove leaf litter and organic material from joints and channels. Leaves trap moisture and hide ponding.
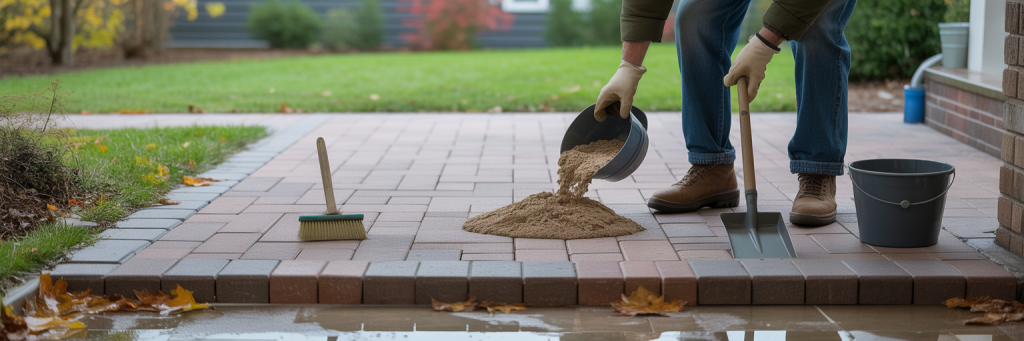
- Re-sand joints: Replace missing joint sand with polymeric sand or a specified joint material. Properly installed joint sand reduces water infiltration and helps units lock together.
- Reset a loose paver: Lift, clean, and recompact the base under a single loose unit and reinstall it. Targeted lifting of small areas reveals whether the base is still sound.
- Clean surface stains: Use a mild paver cleaner to remove algae or oil stains that can trap moisture against the surface.
- Check and clear drains: Remove sediment from nearby catch basins, channel drains, and gutters that direct water toward your patio or walkway.
Seasonal priorities: fall and winter
Connecticut winters are where most damage happens. Taking the right steps in fall and avoiding certain products in winter reduce freeze-thaw damage and sliding risks.
- Fix trip hazards before frost: Relevel dips and loose units before the ground freezes. Contractors recommend addressing active heave or widespread movement rather than postponing work.
- Avoid harsh de-icers: Choose stone-friendly de-icing products. Our site guidance on safe de-icing recommends avoiding rock salt on many natural stones and paver surfaces because salts can erode joint material and stain surfaces.
- Edge support for winter: For unstable edges, a temporary timber or anchored board slows lateral spreading until a permanent repair can be scheduled.
- Protect newly repaired joints: If you replace joint sand in fall, follow manufacturer activation steps for polymeric sands so they set before freeze cycles.
When to call a contractor: clear signals and typical fixes
Some problems need a professional assessment. The following signs usually justify a contractor visit and a test pit to check subbase condition.
- Widespread heave: If large areas move each winter, the subbase has likely been contaminated with fines or trapped water and may need replacement.
- Edge failure or spreading: Missing or broken restraints often require reconstruction of the edge and proper anchoring.
- Ponding after rain: Surface drainage that consistently sends water onto the base indicates grading or drainage fixes are needed.
- Trip hazards created by multiple adjacent units: This often means base loss under a zone rather than isolated surface problems.
When you request an estimate, ask the contractor to excavate a test pit to confirm base depth and materials. Industry guidance commonly specifies base depths between 6 and 12 inches of open-graded crushed stone for pedestrian areas, deeper for vehicular loads. A written scope should list base depth, aggregate type, compaction method, joint material, and edge restraint details.
Repair versus replacement: a practical decision guide
Decide based on whether the failure is local or systemic. Targeted repairs are cost effective when the base is largely intact. Replacement is the right choice when the base is contaminated, drainage has failed, or you plan to add heavier loads.
- Repair if: Problems are isolated to a few units, joint sand can be restored, or the edge restraint is still solid.
- Replace if: Heave, base erosion, or widespread settlement is present. Local project examples on the site show small repairs in the low thousands, while full replacements commonly run between $8,000 and $25,000 depending on size and finish.
- Phased approach: If budget is limited, first fix drainage and edge restraints, then re-sand joints, and finally plan a phased rebuild of deep base sections later.
Routine maintenance schedule and task list
Use this simple schedule to stay on top of preventive care through the year.
- Spring: Inspect for winter damage, re-sand joints, pressure wash surface stains, and clear drains.
- Mid-summer: Pull weeds from joints, check for new seating or subgrade soft spots, and treat moss or algae on shaded areas.
- Fall: Repair loose pavers, top up joint sand, secure edge restraints, and prepare for winter with approved de-icers on hand.
- Winter: Keep snow cleared with plastic shovels or pushers that do not damage units, and use stone-friendly de-icers when needed.
Materials and product notes Connecticut homeowners should know
Not all products are safe for every surface. Match cleaners, sealers, joint sands, and de-icers to your specific paver or stone type.
- Polymeric joint sand: Effective when properly installed and activated. It helps prevent washout and weed growth.
- Sealers: Use a sealer compatible with your material if you want stain resistance, but do not rely on sealers to fix structural or drainage issues.
- De-icers: Choose products labeled safe for pavers or natural stone to avoid joint erosion and surface etching. See our guidance on safe de-icing for paver patios, stone steps, and walkways for specific recommendations.
Common homeowner mistakes and how to avoid them
A few repeat mistakes lead to the largest repair bills. Avoid these to extend patio life and reduce maintenance costs.
- Ignoring minor joint loss: Letting joints wash out allows water into the base and accelerates heave.
- Using the wrong de-icer: Rock salt and certain chlorides damage joints and stone surfaces.
- Postponing drainage fixes: Surface repairs without addressing standing water only delay larger repairs. Fix grading and flow first.
- Hiring by price alone: Low bids that skip base prep or proper edge restraints create repeat problems. Ask for itemized proposals and test-pit findings. Our guide on contractor questions helps you compare scopes: questions to ask a patio contractor in Connecticut.
Checklist summary: one-page view
Print or save this condensed checklist for quick reference before calling a contractor or ordering materials.
- Annual inspection: surface, joints, edges, drainage, vegetation.
- Spring tasks: clean, re-sand, pressure wash, clear drains.
- Fall tasks: fix trip hazards, secure edges, top up joint sand, prepare de-icers.
- Winter actions: use safe de-icers, clear snow with safe tools, avoid heavy salt use.
- When to call pros: widespread heave, edge failure, persistent ponding, planning heavier loads.
- Ask contractors for: test pit results, base depth, aggregate type, compaction method, and edge restraint details.
Frequently Asked Questions
How often should I re-sand joints on a paver patio?
Check joints annually. If sand is missing in more than a few spots, plan to replace it that season. Properly installed polymeric sand can last several years but needs correct installation and activation to prevent washout.
Which de-icers are safe for pavers and natural stone?
Choose products labeled safe for your specific material. Avoid rock salt on many natural stones and some pavers because salts can erode joints and stain. Our safe de-icing guide outlines pet-safe and stone-friendly options and their trade offs.
Why are my pavers heaving every winter?
Recurrent heave usually means the base is saturated or contains fines that freeze and expand. Water infiltration from poor drainage or missing joint sand is the common cause. A contractor test pit can confirm whether the base needs replacement to stop the cycle.
Can I seal my patio before winter to protect it?
Sealing reduces staining and can slow water penetration into joints, but it does not fix structural defects or poor drainage. Use sealers as a complementary measure after joints and grading are corrected.
How deep should the base be for a new walkway?
For pedestrian walkways, contractors commonly specify 6 to 12 inches of open-graded crushed stone, compacted to specification. Deeper bases are required for driveways or heavy loads. Always confirm the recommended depth for your intended use.
Useful further reading and internal resources
For a deeper look at expected lifespans and when replacement is needed, see our post on how long a paver patio lasts. If you are budgeting work or comparing repair versus rebuild costs, our local cost guide explains common price ranges and scope items: patio installation cost guide for Connecticut.
Conclusion
This patio and walkway maintenance checklist focuses your seasonal work so you prevent water from reaching and weakening the subbase, keep joints doing their job, and avoid costly winter damage. Inspect annually, fix drainage first, and use targeted repairs when the base is sound. When heave, widespread settlement, or edge failure appear, schedule a contractor who will perform a test pit and provide an itemized scope that includes base depth, aggregate type, compaction, and edge restraint details. A small investment in maintenance now often saves thousands compared with a full replacement next year.