
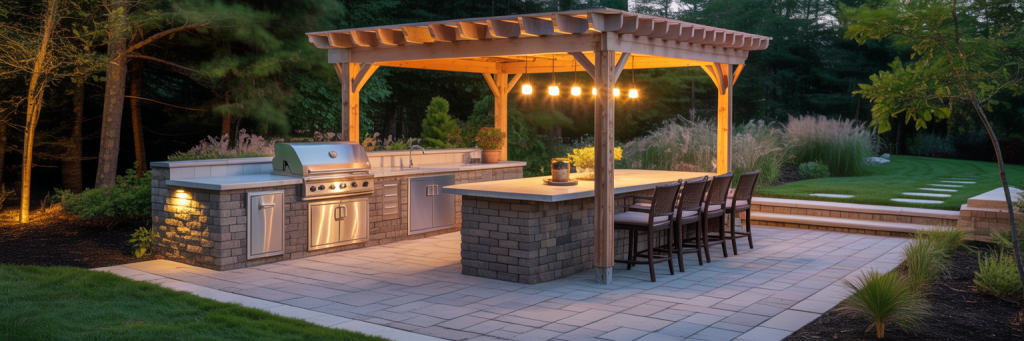
Plan the Perfect Patio Around an Outdoor Kitchen in Connecticut
Designing a patio around an outdoor kitchen starts with a clear plan that balances traffic flow, utilities, materials, and local climate. If you are considering a built-in island or full cooking wall, begin with our outdoor kitchens Connecticut service page to see typical layouts and Connecticut-specific installation notes. This guide gives practical design rules, budget comparisons, layout options for patio kitchen layout CT, and local building considerations so you can brief a contractor or refine your DIY scope.
Why planning the patio and kitchen together matters
A patio and outdoor kitchen are one system. Treating them separately often creates circulation problems, poor drainage, or odd sightlines. A well-planned patio positions the kitchen for sensible service zones, provides adequate seating and clearance, and protects appliances from weather and splashback. For Connecticut sites, frost, drainage and snow management are design constraints you cannot ignore; the U.S. Environmental Protection Agency explains how permeable surfaces reduce runoff and should factor into patio selection for stormwater control EPA: Permeable Pavement.
Key design principles for a patio around an outdoor kitchen
Start with these nonnegotiable rules before sketching materials or picking finishes.
- Work triangles and zones: Separate prep, cooking and serving zones to reduce cross-traffic and to allow multiple cooks to work safely.
- Clearances and circulation: Allow 36 to 48 inches of clear walkway in main circulation paths and 48 to 60 inches in front of the grill or oven for safe operation and appliance doors.
- Base and drainage: Design an engineered base for pavers or stone with 8 to 12 inches of compacted aggregate in CT to resist frost heave; include positive slope away from the house and a channel or French drain where needed.
- Utilities planning: Locate gas, water and electrical runs before paving; factor permit and inspection timelines into your schedule.
- Shade and wind control: Use pergolas, roofs, or strategically placed plantings to reduce sun and wind on cooking surfaces.
Sizing your patio: rules of thumb and a quick calculator
How large should the patio be around an outdoor kitchen? Use the following practical sizing rules based on intended use and seating capacity.
- Simple grill and small table: Minimum 10 by 12 feet to fit a compact island and a four-seat table comfortably.
- Island with bar seating and dining table: Minimum 16 by 20 feet to keep circulation clear while accommodating a 4 to 6 person dining set and bar seating at the island.
- Full kitchen with pizza oven and lounge area: 20 by 30 feet or larger to separate cooking, dining and lounging zones.
To estimate quickly, allow 12 to 15 square feet per seated diner when including circulation and service space. For a 10-person outdoor dining experience around a patio kitchen, plan on 120 to 150 square feet of usable patio beyond the island footprint.
Patio kitchen layout CT: four proven layouts
Choice of layout depends on yard orientation, house access, and how you cook outdoors. Below are common layouts suited to Connecticut properties.
- Linear cooking wall: A single cooking wall parallel to the house. Best where tight footprints or utility access along the house simplify gas and electric runs.
- Island with back-to-house flow: Island sits away from the house with clear approach from the interior. This layout supports bar seating and social cooking.
- L-shaped island: Combines a cook wall and bar face for serving. Good for corner patios and terraces where you want separation between prep and guest seating.
- U-shaped kitchen: Encloses the cook with counters on three sides for maximum surface area and built-in appliances. Works well where you need shelter from prevailing wind.
Site prep, utilities and permit checklist
Plan at least these items into timelines and bids so you avoid cost surprises.
- Survey and grade: Confirm high and low points and design fall away from structures.
- Engineered base: Write base depth and compaction method into the contract for pavers or flagstone to prevent frost movement.
- Utilities: Specify gas line stub, dedicated circuits, and plumbing rough-in; ask whether the bid includes permits and inspections.
- Appliance siting: List make and model so contractors price required clearances, noncombustible backing and hood ventilation correctly.
- Stormwater: Consider permeable pavers or a drainage swale if the patio increases impermeable area; consult Connecticut DEEP guidance for local stormwater rules CT DEEP.
Choosing a contractor and comparing bids
Get at least three itemized bids and compare the same scope line by line. Ask each bidder for:
- Base depth and compaction method written in the scope
- Permits included and who pulls them
- Appliance models specified and whether installation and warranty support are included
- Local references and photos of comparable Connecticut projects
Watch for one-line lump sums. Those hide differences in base, drainage and utility allowances. Reserve a contingency of 10 to 20 percent for unforeseen site conditions, a practice commonly recommended by experienced contractors.
Practical comparison: DIY, hybrid and full-contractor approaches
| Approach | Pros | Cons |
|---|---|---|
| DIY | Lower cost for small patios; control over materials | Requires time and skill; risk of improper base and drainage |
| Hybrid | Owner saves on surfacing while pros handle gas and electric | Requires careful coordination and clear handoff to trades |
| Full contractor | Single point of responsibility, permits and inspections handled | Higher cost; rely on contractor vetting and clear contract |
Local Connecticut considerations that affect design
Seasonal freeze, coastal humidity in southern towns, and local stormwater rules change material and drainage choices. Use local references and ask contractors for examples of projects completed in your town. Alpha Hardscapes documents regional best practices in our hardscaping articles and project galleries; see related guides on hardscaping pavers planning and walkway and patio masonry at Walkway & Patio Pavers.
Finishing touches that improve use and resale
Lighting, seating configuration and landscape buffers matter more than most clients expect. Low-voltage task lighting at prep surfaces and LED step lights at seating reveal the layout at dusk. Built-in seating along a retaining wall adds durable places for guests and reduces the need for movable furniture. Finally, a modest roof or pergola increases season length and improves perceived value in New England climates.
Frequently Asked Questions
How much space do I need between the island and dining table?
Allow at least 48 inches between the island face and the dining table to permit chair movement and walking room. If the island includes bar seating, increase the back-of-chair clearance to 54 inches so seated guests do not block kitchen traffic. These clearances protect workflow when multiple people are cooking and serving.
Do I need permits for an outdoor kitchen in Connecticut?
Permits for gas, electrical and plumbing often apply. Retaining walls, major grading and permanent structures may also require permits. Confirm with your municipal building department and require contractors to list permits included in their bids. Unpermitted utility work can create insurance and resale issues.
What base depth should I specify for pavers under an outdoor kitchen?
For Connecticut, specify an aggregate base of 8 to 12 inches compacted in lifts, depending on soil conditions and expected loads from appliances and furniture. Write compaction method and lift thickness into the contract so bids are comparable and the patio resists frost heave.
Can I put a wood-fired pizza oven on a paver patio?
Yes, but provide a reinforced concrete footing under heavy ovens and a noncombustible landing area per manufacturer instructions. Locate the oven where smoke does not blow toward living spaces and confirm roof and pergola clearances if you site the oven near overhead structures.
How do I choose between bluestone and pavers for a patio kitchen?
Bluestone gives a high-end look and performs well on a strong engineered base, but requires skilled installation and can cost more. Concrete pavers provide consistent sizing, easier repairs and a broader range of colors and patterns. Match choice to desired aesthetic, budget and long-term maintenance expectations.
Conclusion
Planning a patio around an outdoor kitchen requires aligning layout, structure, utilities and materials before you start work. Use clear size and clearance rules, insist on an engineered base for New England frost conditions, and compare itemized bids that include permits. Start with a design review on the outdoor kitchens Connecticut page and bring contractors local references so your patio and kitchen perform for years and add measurable value to your home.